When planning water heater installation, understanding tank vs. tankless heaters is essential. Consider household needs, energy efficiency, and maintenance. Assess space, ventilation, and safety factors for optimal placement. Prepare tools, measure space, and plan plumbing layout beforehand. DIY installation involves shutting off water, removing old heater, securing new one, and connecting water lines. Test the heater after installation. Regular monthly inspections, annual cleaning, and timely maintenance ensure longevity. Avoid common mistakes by matching capacity to needs, following manufacturer guidelines, and addressing issues promptly for efficient operation.
“Water heater setup is a crucial step in ensuring your home’s comfort, especially during chilly months. This comprehensive guide delves into every aspect of installing a water heater for optimal efficiency. From understanding various water heater types suitable for residential use to assessing your home’s specific heating needs, we cover it all. Learn the safety considerations and essential tools required for installation. We provide a detailed step-by-step process, maintenance tips, and troubleshooting advice to help with a seamless transition to a new water heater. Discover how choosing the right size can lead to significant energy savings.”
Understanding Water Heater Types for Home Installation

When setting up a water heater for a home, understanding the different types available is key to making an informed decision. There are primarily two common types: tank and tankless water heaters. Tank heaters store hot water in a reservoir, maintaining a consistent temperature, which makes them convenient for households with high hot water demand. These are ideal for homes where multiple people use hot water simultaneously, ensuring a steady supply. On the other hand, tankless heaters, also known as on-demand or instant heaters, heat water only when needed, without storing it. This is an energy-efficient option, perfect for smaller households or those looking to reduce their energy consumption.
Each type has its advantages and considerations regarding space, cost, and energy usage, impacting the overall Water Heater Installation process. Tankless heaters, for instance, might require a professional’s expertise due to their complex setup, whereas tank heaters are generally easier to install but may demand more frequent maintenance over time.
Assessing Your Home's Requirements for Efficient Heating
When considering a water heater setup for your home, assessing your specific heating needs is a crucial step in efficient and effective water heater installation. Factors like the number of occupants, daily hot water usage, and the overall size of your household play a significant role. For instance, larger families or homes with multiple residents will require a higher capacity heater to meet their demand consistently.
Understanding your home’s requirements allows you to choose the right type and size of water heater. Energy-efficient models are ideal for reducing utility costs and minimizing environmental impact. Modern heaters often come with advanced features like temperature control settings, which enable you to customize heating levels based on your needs, further enhancing energy conservation.
Locating the Ideal Installation Spot: Safety Considerations
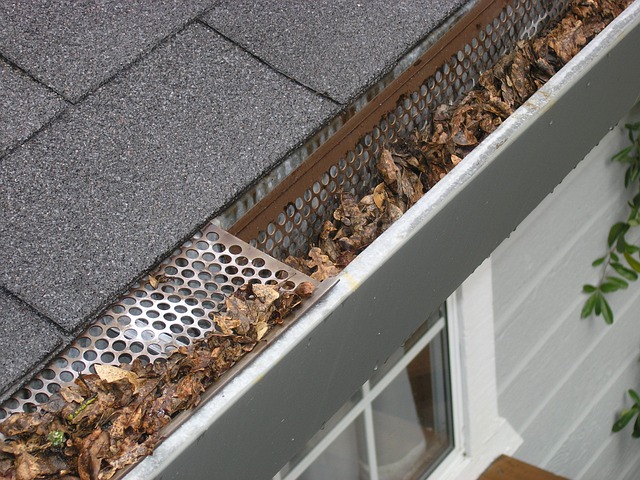
When setting up a water heater for homes, locating the ideal installation spot is crucial for both functionality and safety. The primary consideration is accessibility—choosing a location near plumbing fixtures to minimize hot water travel time. However, it’s equally important to factor in safety. Look for an area that is well-ventilated to prevent gas buildup and ensure easy access for maintenance. Avoid installing water heaters in crowded spaces or places with potential hazards like flammable materials nearby.
Additionally, consider the heater’s weight and stability. Hard surfaces are ideal as they provide a secure base, preventing accidents and damage. Proper grounding is also essential to shield against electrical shocks and reduce the risk of fires. By adhering to these safety considerations, you can ensure a seamless water heater installation process.
Preparing for Water Heater Setup: Tools and Materials Needed
Preparing for water heater setup is a crucial step to ensure a smooth and efficient installation process. Before diving into the installation, gather all the necessary tools and materials. This includes a new water heater (sized appropriately for your home’s needs), insulation materials, pipes and fittings, a pipe wrench or pliers, a tape measure, safety gear, and possibly a helper for heavier tasks.
It’s also essential to assess your current plumbing setup and identify where the water heater will be placed. Mark the positions of water lines and any potential obstacles that may require adjustments during installation. Having everything prepared in advance allows for a more organised and efficient water heater installation process, minimising potential delays or complications.
Step-by-Step Guide to Installing a Water Heater
Installing a water heater is a task that many homeowners can tackle with the right tools and some basic DIY skills. Here’s a step-by-step guide to ensure a smooth process:
1. Preparation: Turn off the water supply valves located at the base of the existing water heater or where it enters your home. This prevents any accidents during installation. Next, drain the old heater by opening the relief valve at the top of the tank until all water has been released. Remove the old heater with care, noting its orientation and how it was secured.
2. Location and Security: Choose a suitable location for the new heater, ensuring proper ventilation and easy access. Secure the heater in place using the provided straps or brackets, positioning them at evenly spaced intervals around the tank to ensure stability. Connect the water supply valves again after double-checking their tightness.
Connecting and Testing: Ensuring Proper Functionality

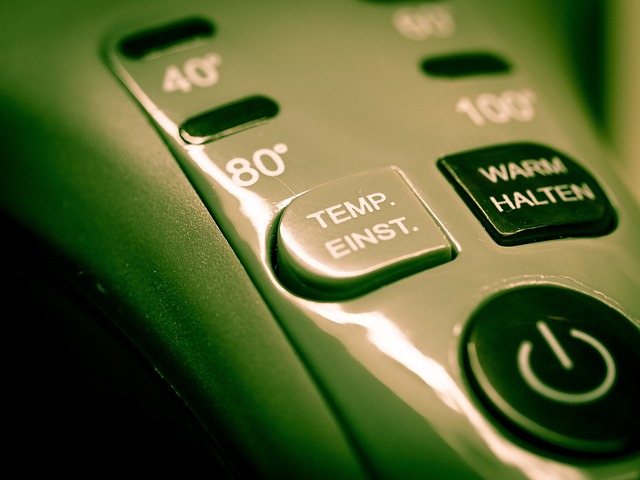
After successfully installing your new water heater, the next crucial step is connecting and testing it to ensure proper functionality. Begin by attaching the hot and cold water lines to the corresponding terminals on the heater, making sure to use the appropriate fittings and tight connections for secure and leak-free joints. Once the physical connections are made, turn on the water supply valves, located near the bottom of the tank or on the pipes leading into the heater, to fill the tank with water.
To test its operation, set your desired temperature using the control knob and wait for the water to heat up. Check if the heater is functioning correctly by observing the heating element (if applicable) and ensuring it’s active during the heating cycle. Additionally, run a hot water tap in another part of the house to verify that the heater is circulating and delivering hot water throughout your plumbing system without any issues.
Maintenance Tips for Optimal Performance and Longevity

Regular maintenance is key to ensuring your water heater installation performs optimally and lasts for many years. Start by inspecting the tank for any signs of corrosion, leaks, or damage at least once a month. If you notice any issues, address them promptly to prevent further complications. Cleaning the tank annually is also essential. Sediment buildup can reduce efficiency and even cause potential safety hazards. Most water heaters come with a cleaning tool or brush designed for this purpose.
Additionally, check the pressure relief valve regularly to ensure it’s functioning correctly. This valve protects your heater from excessive pressure, which could lead to damage. Keep an eye on any unusual noises coming from the heater, as they may indicate problems with the heating elements or other components. Timely maintenance not only enhances performance but also extends the life of your water heater, saving you money in the long run.
Common Issues and Troubleshooting for New Installations
New water heater installations can sometimes come with their fair share of challenges. One common issue is improper sizing, leading to either inadequate hot water supply or excessive energy consumption. It’s crucial to match the heater’s capacity to your household needs and water usage patterns. Another frequent problem is incorrect placement, which may result in inefficient heating or even potential safety hazards. Ensure the heater is installed according to manufacturer guidelines, away from flammable materials, and with adequate ventilation.
Troubleshooting tips for new installations include checking for leaks, ensuring proper temperature settings, and verifying the heater’s power source. If hot water pressure is low, inspect the pressure relief valve and check for mineral buildup in the tank. In case of unusual noises, examine the heater’s components for any loose connections or debris. Regular maintenance and timely attention to these issues can extend the lifespan of your water heater and ensure optimal performance.
Choosing the Right Size: Energy Efficiency and Cost Savings
When considering a water heater setup for your home, choosing the right size is paramount to achieving energy efficiency and significant cost savings. The ideal water heater capacity depends on several factors, including the number of occupants in your household, daily hot water usage, and the climate you live in. For instance, families with multiple members who frequently take long showers or run multiple hot water appliances simultaneously will require a larger tank than smaller households.
Size is directly correlated with energy consumption. Larger tanks may be more suitable for households with higher hot water demands, as they ensure consistent access to hot water without frequent heating cycles that consume more energy. Efficient models, often featuring advanced insulation and heating elements, can further reduce energy bills. Properly sized heaters not only minimize energy wastage but also extend the lifespan of your water heater by preventing excessive stress on the system.